Article
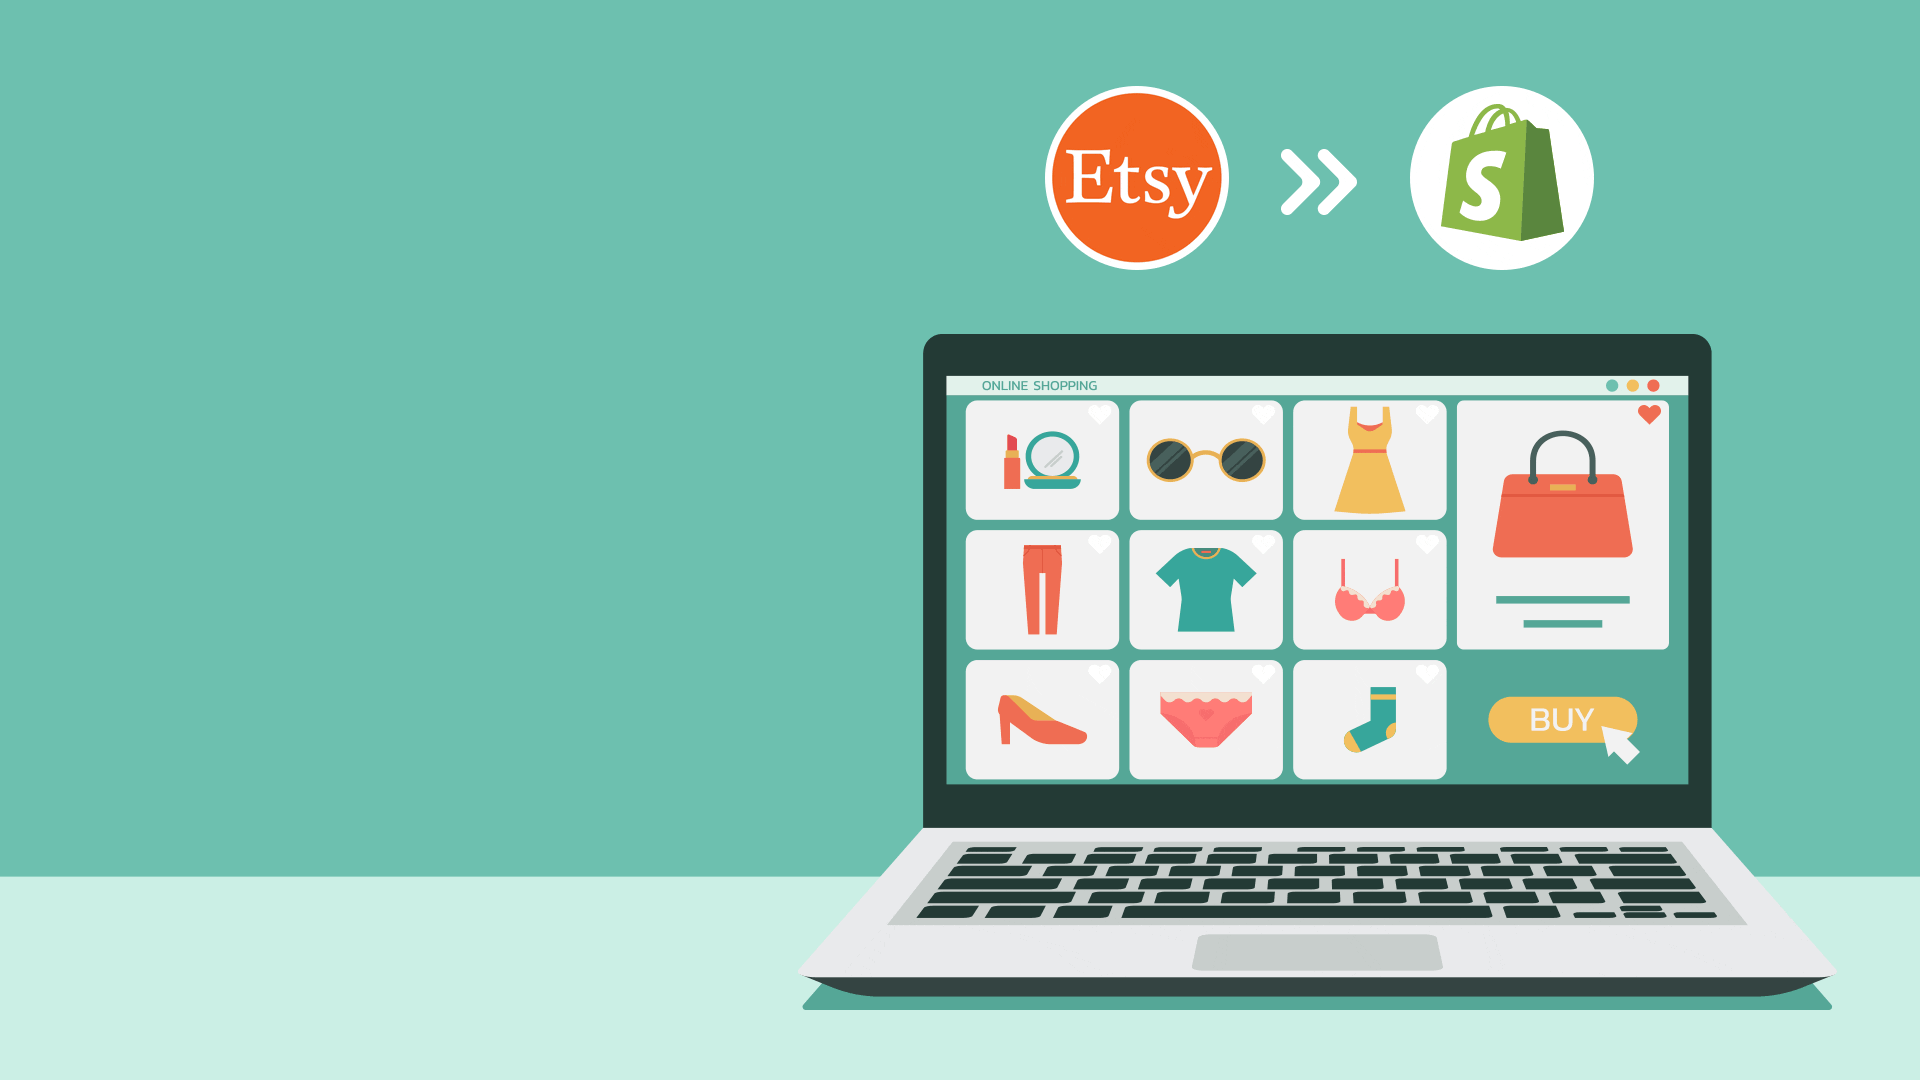
How to migrate your website from Etsy to Shopify

PUBLISHED:June 7, 2022
Etsy is a popular eCommerce solution for small-scale sellers who are just starting out. But as the business grows, Etsy can be found to be quite limiting. This is when users look to migrate from Etsy to Shopify.
I’ve been a customer of many Etsy stores over the past few years and know several people who run their businesses online with Etsy with great success, so the platform is clearly doing something right. However, I’m also hearing that some sellers are becoming tired of the restrictions which make it hard to grow their brand.
For example, it’s not possible to use your own domain name for your Etsy store. You can only set up a forwarder on your domain so that when a user types in yourstorename.com they are taken to etsy.com/uk/shop/yourstorename. This alone is often enough to want to migrate your website from Etsy to Shopify.
Move your website from Etsy to Shopify
We recently helped Perseus Goods move their store from Etsy to Shopify after they became frustrated with the platform. The process did not come without its challenges, so we thought we’d write an article that helped outline the process.
We’re going to cover each of the main steps in the process of migrating your store from Etsy to Shopify, including links to pages on both platforms which go into more in-depth detail.
Let’s get started!…
1 – Register your website domain
You may have done this already, but the first step of migrating from Etsy to Shopify is to make sure that you have registered a suitable domain name for your brand.
You can use a service such as 123-reg, Godaddy or Google Domains to register your website domain. Try to obtain a TLD (Top Level Domain) such as a .co.uk or a .com, but if you find that your brand name is taken for those, you can explore using other options, such as the .store or .shop extensions.
You’ll also use your domain for store-related emails. Using a Gmail address when trying to grow your brand just does cut it, so make sure you set up a suitable email address to use with your new store such as sales@yourstorename.com. You might use this when setting up your Shopify store.
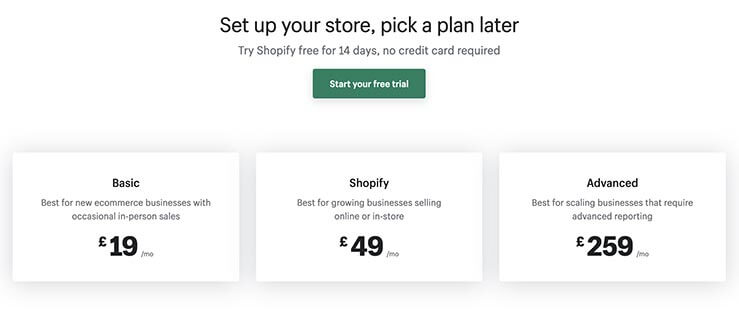
2 – Set up your Shopify store
With your domain name registered, you’ll then want to set up your Shopify store.
There are several plans to consider, but most users tend to start with the basic plan and then upgrade if they need to. You get the first 14 days free, which is usually enough time to set up your Shopify store.
When registering with Shopify, use an email address that you have access to. This can be a Gmail address or a branded email address that you may have set up during step one.
3 – Link your domain to Shopify
Once you’ve set up your Shopify store account, you’ll want to log into your domain account and link your domain to Shopify.
With both Shopify and your domain accounts open, you’ll want to follow these instructions to link your domain to Shopify.
Linking your domain may look a little daunting, but it’s actually quite straightforward. If you do have trouble, we suggest that you contact your domain registrar’s technical support.
Once your domain is linked to your Shopify account, you’ll be able to use it in all of your marketing materials. Users will simply type yourstorename.com into their browser and be taken to your Shopify store. The domain will also show in the browser’s address bar and not yourstorename.myshopify.com which is the default Shopify store name URL.
Now, don’t worry. People will not start finding your domain in Google search results for a while. You’ll need to finish the store set-up and add your products first. Then you can drive traffic to the store through on & offline promotions.
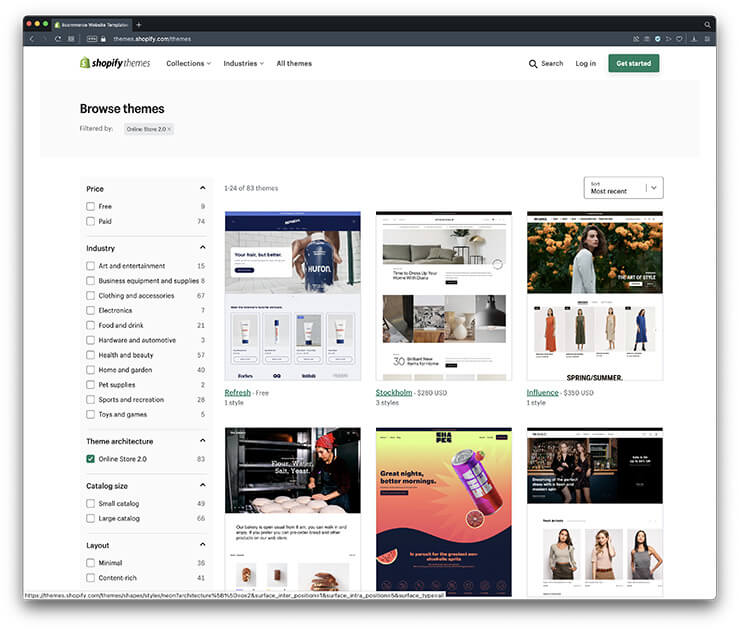
4 – Choose a theme for your Shopify store
Now it’s time to really get stuck into the set-up of the store itself. The first step is to choose a theme for your Shopify store.
The theme is what governs the look of the website. Everything from the way that the navigation is displayed through to the functionality of each element is dictated by the theme.
There are free themes and paid-for themes. You can view all the Shopify themes here and play with the demos, which we recommended that you do extensively. Make notes on each theme that you like (pros and cons) and then decide upon the theme that best suits your needs.
Once you have settled on the theme that you would like to use, simply click the Try Theme button to add it to your account.
You will then need to publish the new theme so that it replaces the default theme that was installed during your account setup.
Once the theme is installed, you can customise the look and structure of your Shopify store to fit your requirements.
5 – Export your products from Etsy
With the theme installed, you’ll want to export your products from Etsy and import them to your new Shopify store.
The best way to do this is with one of the many apps available in the Shopify App Store. But first, you should log in to your Etsy store and download all of your data so that you have a backup of your store data on your computer.
This way, when you are ready to close your Etsy store, you will have a record of your sales and products for future reference. If you do not do this, you will lose all of your data when you close your Etsy store.
You can export four sets of data from Etsy as follows:
- Current Listing
- Past Orders
- Shop Settings
- Reviews
Simply log in to your Etsy store and follow this path to access the downloads:
Settings > Options > Download Data
It’s wise to down all database files as CSV files for future reference. Make sure you keep a copy on your machine and use a service such as Google Docs or Dropbox to keep another backup, just in case.
Do not close your Etsy store yet. This would be the very last thing to do once the new Shopify store is up & running.
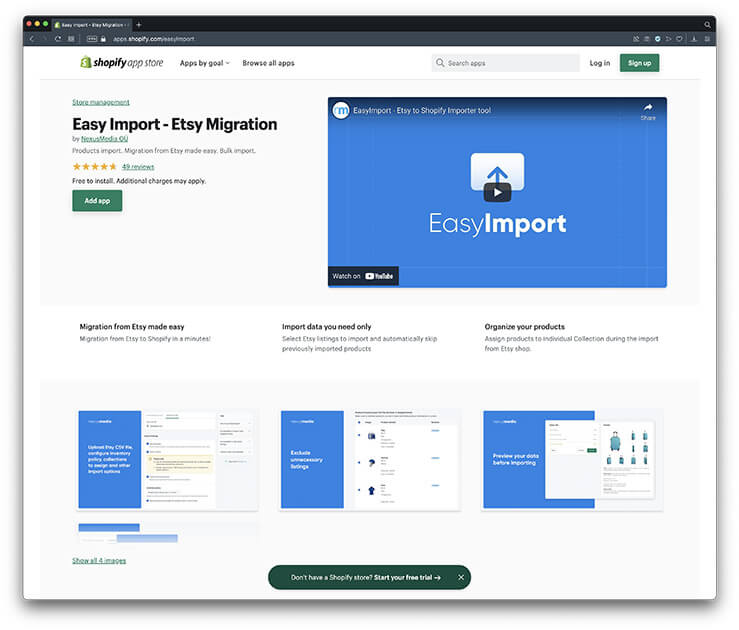
6 – Import your product data into Shopify
It’s possible to import your product data into Shopify using the CSV files that you download in step 5 above, but the CSV files will likely need editing, which can be a laborious process. So we suggest using one of the Shopify apps for this task.
There are many apps available and they are forever changing. We found that the Easy Import app worked rather well, but if you feel like investigating some others, you can find all apps here. Just search ‘Etsy’ to filter the apps for your requirements.
7 – Review your imported products
After you have imported your product data, you should review your products to make sure that everything is as expected.
The app should flag any errors during the import process, but there may be a few instances of missing data, so you’ll want to take the time to make sure that everything looks correct.
Reviewing your products also means checking that the correct product categories are in place. The app should import your category structure, but if for some reason this is not the case, now is the perfect time to set up your product categories and tag your products with those categories.
8 – Migrate your customer contact details
You would be forgiven for thinking that the migration app will also import your customer contact details, but this is not always the case. In fact, the lack of access to customer details within Etsy is another reason why people get frustrated with the platform.
You’ll notice that it’s not possible to directly export your customer database from Etsy, which is a pain if you wish to use a CRM tool such as Mailchimp for email promotions.
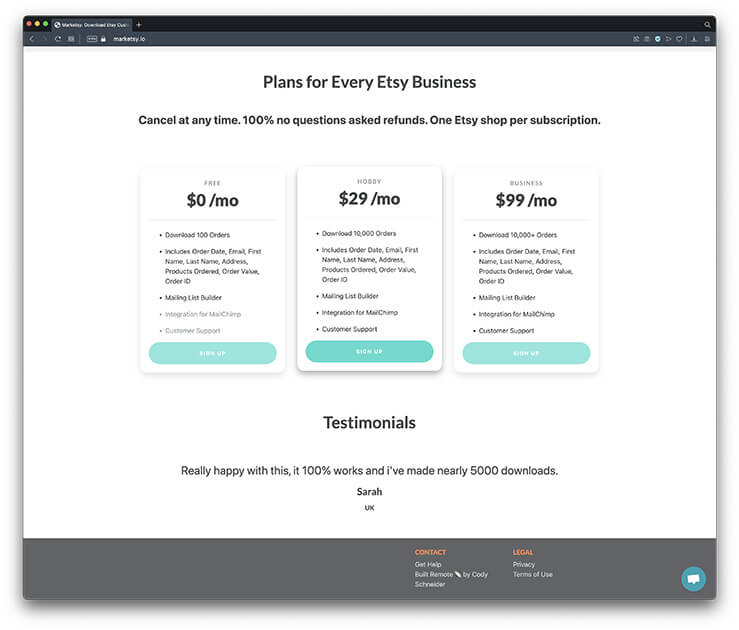
The only way to access this information is to use a third-party tool such as Marketsy.
These tools allow you to extract customer data from your Etsy store, but unfortunately, they are not free. However, your data is likely worth at least one month’s paid subscription to one of these services, so we feel that it’s worth the expense.
So, if your customer data has not successfully migrated with your product data during step 6, you’ll want to migrate your customer contact details from Etsy to Shopify using this method.
One important thing to remember is that customer account log in details are NOT transferable. This is due to data protection. So, when you contact all of your customers about your new store, you should let them know that they will need to create a new account.
9 – Finish setting up your Shopify store
All of your products are now in place, your product categories are set up and your customer contact details have been successfully imported. It’s time for the finishing touches.
To finish setting up your Shopify store you’ll need to add all of the other pages that your website requires such as:
- Home page
- About us
- Contact
- Privacy Policy
- News, etc
Some of these may have been automatically added when the theme was installed, but if not, you can use the theme’s page builder tools to create them and style them accordingly.
Make a test purchase and refund
It’s very important to state that before you launch your website, you should make a few test purchases and refunds to make sure your site works as you need it to.
This includes charging the correct shipping, having the funds reach your bank account and that the correct email notifications are sent to the buyer and the seller.
You can perform these tasks by initiating testing mode.
When you are happy with the transactional side of things, you are free to launch your new Shopify store.
10 – Launch your Shopify store!
Launching your Shopify store is as simple as removing the password protection page that is turned on by default when you create your Shopify account.
To remove your password protection page and launch your Shopify store, simply follow these steps:
- From your Shopify admin, go to Online Store > Preferences.
- In the Password page section, uncheck the Enable password page option.
- Click Save.
Your store is now open for business!
Closing your Etsy store
With your Shopify store now live, you are in the position where you have two online stores active. You’ll have your original Etsy store and your new Shopify store. So, you’ll need to decide upon a strategy for closing the Etsy store.
You should first decide upon a date on which you will close your Etsy store. Once you have set the date, we suggest that you use the Shopify marketing tools to send an email to your customers notifying them that you are moving from Etsy to Shopify.
To encourage sales on your new Shopify store, we suggest setting up a discount code and including that in the email that you send to your customers.
On your Etsy store, access your settings and use the following fields to notify visitors that you will be closing your store on a particular date and that you will be moving to yourstorename.com:
- Shop title
- Shop announcement
- Message to buyers
- Shop story
A few days before you plan on closing your Etsy store, send another email to your customers from your new Shopify store and repeat the discount code offer. This will act as a good reminder that you will be closing your Etsy store.
Finally, before you actually close your Etsy store, you’ll probably want to do one more export of your data, just to make sure that you have a copy of all your Etsy orders. Particularly any that have been made after you launched your Shopify store.
When you are ready, follow these instructions to close your Etsy store.
In Conclusion
Here are the 10 steps that you’ll follow to move your website from Etsy to Shopify:
- Register your website domain
- Set up your Shopify account
- Link your domain to Shopify
- Choose a theme for your Shopify store
- Export your product data from Etsy
- Import your product data into Shopify
- Review your imported products
- Migrate your customer contact details
- Finish setting up your Shopify store
- Launch your store!
It may seem like a lot of work, but the process is actually quite straightforward and shouldn’t take you too long to work through.
If you would rather someone else take care of this for you, we have team members who are adept at this task and will help you launch your new Shopify store quickly and smoothly.
Feel free to get in touch if you would like to know more about how to migrate your website from Etsy to Shopify.
Additional Reading
Here are a few related articles that you may find useful:
- Create an SEO Strategy for a new website
- What is Local SEO?
- What are the differences between WordPress and Shopify eCommerce websites?
We hope you find these useful and that you’ll come back again soon for more useful tips.
Need a new eCommerce store?
Prefer to talk to someone?
